Github Pages: Moving out
Project stats
- Difficulty: medium 3/5
- Cost: 5-50€/Month
- Time: ~10h
Motivation
I decided to move my Website from Github-Pages to my own server. I have two reasons for that: First, I want the server to be situated in Germany (data protection) and second, I wanted a simple way of providing my page in two languages.
In addition, I might be able to realize additional wishes: Setup a miniature file server and add a Website for my small side-hustle. But those will be handled in a future post.
Overview
In this project, I’ll rent a virtual server, configure access via SSH and install a container manager called Docker.
In one of the containers, I want an instance of gitea to provide version controls for website, and have a CI/CD1 pipeline setup that automatically integrates and deploys my site.
Not unlike Github, Gitea Actions allows me to deploy the site built with Jekyll via Workflow files on a caddy-Server instance.
caddy is not just a webserver, but also provides a reverse proxy which does Port mapping and address resolution. In addition, caddy manages my https certificates easily per Let’s Encrypt.
As caddy will run in an own docker container, I have to generate and configure virtual networks so the containers can “talk” to each other.
Let’s get going - step by step.
Configuring my server
The upcoming sections describe the individual steps of configuring a cloud-server for deployment of a static site, including version control and CI.
configure SSH for the server
Right after ordering the “Cloud-server”, I enabled SSH access and deactivated its password login.
To connect from my machine, I check whether the ssh-agent is already up and running per eval ssh-agent.
Then, I create a new key pair via
ssh-keygen -t ed25519 -C "your_email@example.com" -f "~/.ssh/my-cloud-server"
This line creates a key pair with algorithm (-t) ed25519, taking a mail address as comment (-C) that is then saved with filename (-f) my-cloud-server.
The public key file my-cloud-server.pub is then uploaded on the web portal of my server using the “security” tab. The resulting fingerprint is then verified with:
ssh-keygen -lf <fingerprint_from_server> "~/.ssh/mein-cloud-server"
Finally, I modified the .ssh/config file so that, to connect, I just need to enter ssh server into my console instead of the server’s IP-Address - pretty Lazy 😀
#.ssh/config
Host server
  User root
  Hostname ip_address_of_server
  PreferredAuthentications publickey
  IdentityFile ~/.ssh/my-cloud-server
Now when I enter ssh server the first time, I get a prompt about a potential connection to a yet unknown host with fingerprint xyz and get asked whether I’d want that to happen. I compare this fingerprint to the server’s (use provider’s Website to verify). This way I can make sure that I’m trying to connect to the correct party. Once I give my yes, the fingerprint is added to the known_hosts file and future connections will be made directly and without warning.
Install Docker 🐳
My server runs a standard Ubuntu that supports apt commands out of the box. So installing Docker per Manual is really easy: Connect to the server per SSH, type apt install docker, done. I’ll be using docker-compose which also auto-installs. Compose interprets configuration files that define the target container and make it really easy to get them up and running.
Install caddy 🛒
First, I create a folder in my /opt directory via mkdir caddy2. To have caddy run in an own container, I change into that directory and create the following docker-compose.yml file:
#caddy2/docker-compose.yml

version: '3'
services:
  caddy:
    image: caddy:latest
    container_name: caddy
    ports:
      - "80:80"
      - "443:443"
    environment:
      - ACME_AGREE=true
    restart: unless-stopped
    volumes:
      - ./Caddyfile:/etc/caddy/Caddyfile
      - ./caddy_data:/data
      - ./caddy_config:/config
      - ./www:/www
    networks:
      - caddy-proxy

networks:
  caddy-proxy:
    external: true
This file tells docker to use latest caddy release. The container is named caddy and uses ports 80 (http) and 443 (https). Certificates are requested via ACME_AGREE and the container is able to access required files (Caddyfile, data, config) on my host machine via a volume. It will also be able to access files in /www folder that, in the future, will host my blog’s site data. The container is part of the caddy-proxy network that has been provided externally.
So, to be able to run this, I’ll first have to create that network:docker network create caddy-proxy. Then a quick check per docker network ls shows that the network has been added:
NETWORK ID   NAME            DRIVER    SCOPE
<redacted>  bridge           bridge    local
<redacted>  caddy2_default   bridge    local
<redacted>  caddy-proxy      bridge    local
Now I create a Caddyfile configuration with following content:
# caddy2/Caddyfile
blog.schallbert.de {
        root * /www/blog
        encode gzip
        file_server
}
Caddy is told that the content of /www/blog shall be provided as a (static) file server, supporting gzip-compression, available under blog.schallbert.de.
Create a test website 🧪
Before we start with the page design, we should be able to have the address resolved2. I log into my DNS-manager and bind a static IP address to my subdomain:
TYPE  NAME                VALUE            TTL
A     blog.schallbert.de  <redacted>       86400
My server shall be able to show something. So let’s create a minimalistic test page:
mkdir ~/caddy2/www/blog
cd ~/caddy2/www/blog
nano index.html
Hmm, Just a little something:
<!-- blog/index.html -->
<h1>ALL YOUR BASE ARE BELONG TO US</h1>
Save it, done.
This is how caddy’s root directory looks like now:
*caddy_config* *caddy_data* Caddyfile docker-compose.yml *www*
We’re ready now to create the container:
docker compose up -d
The Option -d means “detach”, so the container is started and detached from the console, unblocking it so we can reuse it for more prompts.
[+] Running 1/1
 ✔ Container caddy  Started
This looks good. Now I navigate to the page:

Install Gitea 🍵
I need Gitea for two purposes: I want version control also for private repositories and I want to host my website with Jekyll with full CI/CD automation.
Like caddy, it starts with a folder:
cd /opt
mkdir gitea
cd gitea
nano docker-compose.yml
I compiled Gitea’s docker-compose.yml out of dfferent example files. Here it is:
# gitea/docker-compose.yml
version: "3"

networks:
  gitea:
    external: false
  caddy-proxy:
    external: true
    name: caddy-proxy

services:
  gitea:
    image: gitea/gitea:latest
    container_name: gitea
    restart: always
    environment:
      - USER_UID=1000
      - USER_GID=1000
      - SSH_DOMAIN=git.schallbert.de
      - GITEA_HOSTNAME=git.schallbert.de
    networks:
      - gitea
      - caddy-proxy
    volumes:
      - ./gitea:/data
      - ./log:/app/gitea/log
      - /etc/timezone:/etc/timezone:ro
      - /etc/localtime:/etc/localtime:ro
    ports:
      - "127.0.0.1:3000:3000"
      - "222:22"
  runner:
    image: gitea/act_runner:nightly
    environment:
      - CONFIG_FILE=/config.yml
      - GITEA_INSTANCE_URL=https://git.schallbert.de
      - GITEA_RUNNER_NAME=ichlaufe
      - GITEA_RUNNER_REGISTRATION_TOKEN=
    volumes:
      - ./runner/config.yml:/config.yml
      - ./runner/data:/data
      - /var/run/docker.sock:/var/run/docker.sock
This is what it does: gitea is member of docker networks gitea and caddy-proxy. The latter has been added so I can reach gitea from “the internet”. The container running the service is named gitea and is automatically restarted when down. User-ID is set to 1000 so it won’t interfere with admins or other special users. Per SSH and http, gitea can be reached under git.schallbert.de on ports 22 and 3000 - the latter is localhost only.
Gitea has access to the host’s time zone and local time, it saves its logs under /logand files under /data. Gitea gets an action runner that runs on the gitea instance. Its name is ichlaufe and the config is available under config.yml as a volume. The runner can access Docker daemon’s standard-socket to run actions, e.g. install ubuntu-latest in an own container to run Jekyll builds. I took the basic config for the runner from the official repository.
Gitea will only accept runners that are registered via GITEA_RUNNER_REGISTRATION_TOKEN. We’ll do this at a later point in time.
Now we start Gitea for the first time and look at the console print:
docker compose up
[+] Running 4/2
 ✔ Network gitea_default     Created                                                                0.0s
 ✔ Network gitea_gitea       Created                                                                0.1s
 ✔ Container gitea           Created                                                                0.1s
 ✔ Container gitea-runner-1  Created                                                                0.0s
Attaching to gitea, gitea-runner-1
gitea           | Server listening on :: port 22.
gitea           | Server listening on 0.0.0.0 port 22.
gitea           | 2023/11/18 17:19:52 cmd/web.go:242:runWeb() [I] Starting Gitea on PID: 15
gitea           | 2023/11/18 17:19:52 cmd/web.go:111:showWebStartupMessage() [I] Gitea version: 1.21.0 built with GNU Make 4.4.1, go1.21.4 : bindata, timetzdata, sqlite, sqlite_unlock_notify
gitea           | 2023/11/18 17:19:52 cmd/web.go:112:showWebStartupMessage() [I] * RunMode: prod
gitea           | 2023/11/18 17:19:52 cmd/web.go:113:showWebStartupMessage() [I] * AppPath: /usr/local/bin/gitea
gitea           | 2023/11/18 17:19:52 cmd/web.go:114:showWebStartupMessage() [I] * WorkPath: /data/gitea
gitea           | 2023/11/18 17:19:52 cmd/web.go:115:showWebStartupMessage() [I] * CustomPath: /data/gitea
gitea           | 2023/11/18 17:19:52 cmd/web.go:116:showWebStartupMessage() [I] * ConfigFile: /data/gitea/conf/app.ini
gitea           | 2023/11/18 17:19:52 cmd/web.go:117:showWebStartupMessage() [I] Prepare to run web server
Configure web access
Now I have another subdomain added to my DNS manager:
TYPE  NAME                VALUE            TTL
A     git.schallbert.de   <redacted>       86400
I also have to modify Caddyfile so that web requests are forwarded accordingly (reverse proxy). To do this, I navigate back to the caddy2 folder, type nano Caddyfile and add the following section:
# caddy2/Caddyfile
git.schallbert.de {
        reverse_proxy * http://gitea:3000
}
Now requests to git.schallbert.de are forwarded to the (local) port 3000 of the Gitea-container that I opened in the docker compose file before.
Configuring Gitea per web page
When I use my browser to navigate to the above page, I get a login screen - identical to this demo.
Now I create a nice password, click Register and then configure Gitea using my browser. I only do a rough config because I’ll have to modify it again later to properly add the runner.
When done, I create a new SSH key pair as described in the section Configure SSH above with filename -f ~/.ssh/gitea. It is uploaded and verified under Settings->SSH/GPG Keys.
Now I can create another entry on my local machine’s .ssh/config file:
# .ssh/config
Host gitea
  User schallbert
  Hostname git.schallbert.de
  PreferredAuthentications publickey
  Identityfile ~/.ssh/schallbert_gitea
Let’s check if this works:
ssh gitea
Host 'git.schallbert.de' is known and matches the ED25519 host key.
debug1: Found key in /home/schallbert/.ssh/known_hosts
Perfect.
Complete Gitea config via app.ini
As the configuration is not complete, I shut down the container again:
docker compose down
and then navigate to /gitea/gitea/conf and modify the app.ini just a little:
# conf/app.ini
APP_NAME = Gitea: Git with a cup of tea
RUN_MODE = prod
RUN_USER = git
WORK_PATH = /data/gitea

[repository]
ROOT = /data/git/repositories
DEFAULT_BRANCH = main

[repository.local]
LOCAL_COPY_PATH = /data/gitea/tmp/local-repo

[repository.upload]
TEMP_PATH = /data/gitea/uploads

[server]
APP_DATA_PATH = /data/gitea
DOMAIN = git.schallbert.de
SSH_DOMAIN = git.schallbert.de
HTTP_PORT = 3000
ROOT_URL = https://git.schallbert.de/
DISABLE_SSH = false
SSH_PORT = 222
SSH_LISTEN_PORT = 22
LFS_START_SERVER = true
LFS_JWT_SECRET = <redacted>
OFFLINE_MODE = false

[database]
PATH = /data/gitea/gitea.db
DB_TYPE = sqlite3
HOST = localhost:3306
NAME = gitea
USER = root
PASSWD =
LOG_SQL = false
SCHEMA =
SSL_MODE = disable

[indexer]
ISSUE_INDEXER_PATH = /data/gitea/indexers/issues.bleve

[session]
PROVIDER_CONFIG = /data/gitea/sessions
PROVIDER = file

[picture]
AVATAR_UPLOAD_PATH = /data/gitea/avatars
REPOSITORY_AVATAR_UPLOAD_PATH = /data/gitea/repo-avatars

[attachment]
PATH = /data/gitea/attachments

[log]
MODE = file
LEVEL = info
ROOT_PATH = /data/gitea/log

[security]
INSTALL_LOCK = true
SECRET_KEY =
REVERSE_PROXY_LIMIT = 1
REVERSE_PROXY_TRUSTED_PROXIES = *
INTERNAL_TOKEN = <redacted>
PASSWORD_HASH_ALGO = pbkdf2

[service]
DISABLE_REGISTRATION = true
REQUIRE_SIGNIN_VIEW = false
REGISTER_EMAIL_CONFIRM = false
ENABLE_NOTIFY_MAIL = false
ALLOW_ONLY_EXTERNAL_REGISTRATION = false
ENABLE_CAPTCHA = false
DEFAULT_KEEP_EMAIL_PRIVATE = false
DEFAULT_ALLOW_CREATE_ORGANIZATION = false
DEFAULT_ENABLE_TIMETRACKING = true
NO_REPLY_ADDRESS = noreply.localhost

[lfs]
PATH = /data/git/lfs

[mailer]
ENABLED = false

[openid]
ENABLE_OPENID_SIGNIN = true
ENABLE_OPENID_SIGNUP = true

[cron.update_checker]
ENABLED = false

[repository.pull-request]
DEFAULT_MERGE_STYLE = merge

[repository.signing]
DEFAULT_TRUST_MODEL = committer

[attachment]
PATH = /data/gitea/attachments

[log]
MODE = file
LEVEL = info
ROOT_PATH = /data/gitea/log

[security]
INSTALL_LOCK = true
SECRET_KEY = <redacted>
REVERSE_PROXY_LIMIT = 1
REVERSE_PROXY_TRUSTED_PROXIES = *
INTERNAL_TOKEN = <redacted>
PASSWORD_HASH_ALGO = pbkdf2

[service]
DISABLE_REGISTRATION = true
REQUIRE_SIGNIN_VIEW = false
REGISTER_EMAIL_CONFIRM = false
ENABLE_NOTIFY_MAIL = false
ALLOW_ONLY_EXTERNAL_REGISTRATION = false
ENABLE_CAPTCHA = false
DEFAULT_KEEP_EMAIL_PRIVATE = false
DEFAULT_ALLOW_CREATE_ORGANIZATION = false
DEFAULT_ENABLE_TIMETRACKING = true
NO_REPLY_ADDRESS = noreply.localhost

[lfs]
PATH = /data/git/lfs

[mailer]
ENABLED = false

[openid]
ENABLE_OPENID_SIGNIN = false
ENABLE_OPENID_SIGNUP = false

[cron.update_checker]
ENABLED = false

[repository.pull-request]
DEFAULT_MERGE_STYLE = merge

[repository.signing]
DEFAULT_TRUST_MODEL = committer

[oauth2]
JWT_SECRET = <redacted>

[actions]
ENABLED = true
Here it is important to make sure that ROOT_URL and port configuration match the one specified in docker-compose.yml. I configure its database (sqlite3) and make it available to Gitea. Plus, I deactivate Giteas ability to register new users DISABLE_REGISTRATION = true and the option to sign up/in via openID ENABLE_OPENID_SIGNIN = false ENABLE_OPENID_SIGNUP = false. Finally, I enable Gitea Actions ENABLED = true and save the file.
Now I can restart the container:
docker compose up
[+] Running 4/4
 ✔ Network gitea_default     Created 0.1s
 ✔ Network gitea_gitea       Created 0.0s
 ✔ Container gitea           Started 0.0s
 x Container gitea-runner-1  Error   0.1s
Very well, Gitea is up and running. In a last step, I configure the Action Runner.
Setup Action Runner 🏃
I use the official documentation provided by Gitea for inspiration.
I login to Giteas Web surface and see that activating Actions in the app.ini added another menu: Settings->Actions.
Here I click Create new Runner und copy its REGISTRATION TOKEN.
Then, I re-open Gitea’s docker-compose.yml and add the following lines as recommended in the doc page:
# gitea/docker-compose.yml
# [...]
runner:
    image: gitea/act_runner:nightly
    environment:
      - CONFIG_FILE=/config.yml
      - GITEA_INSTANCE_URL=https://git.schallbert.de
      - GITEA_RUNNER_NAME=ichlaufe
      - GITEA_RUNNER_REGISTRATION_TOKEN= <redacted>
I restart the container with docker compose down && docker compose up -d and get a “started” message for the runner in the logs:
✔ Network gitea_default     Created  0.1s
✔ Network gitea_gitea       Created  0.0s
✔ Container gitea           Started  0.0s
✔ Container gitea-runner-1  Started  0.1s
Great, let’s have a look at the web page:

Now we have to know if the runner can do something for us.
Runner functional test
Once again, I have a look at the Runner’s documentation. To check, I create a new Repository on the web surface, name it runner-test, and add a file to /.gitea/workflows/01-test.yml containing the recommended runner check.
Commit, push, and - nothing.
Oh, the workflow starts on: [push]. This cannot work when it has just been uploaded itself.
Well, let’s touch another random file in the repository. Commit, push, result:
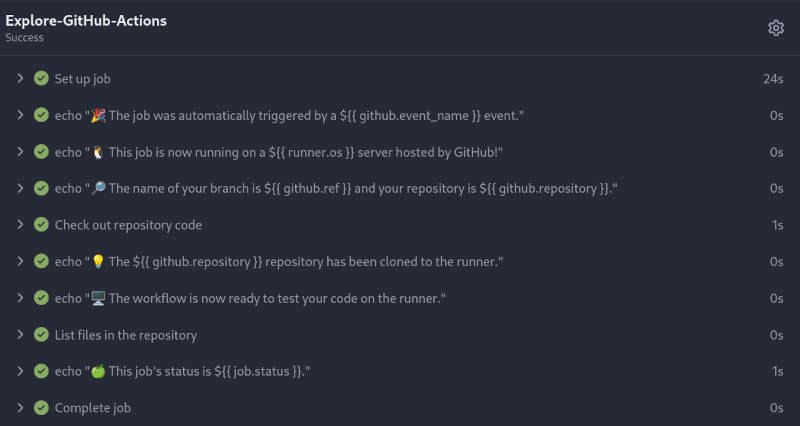
Fantastic! 🥳
Interim conclusion
In this article, I pretended that the road to a working server setup was straight and without obstacles. Of course, that is not entirely true. It was really simple to run images in Docker, but to have them communicate turned out less straight-forward. I also had quite some problems with Caddyfile as it is hard to debug and I couldn’t see what I was doing wrong.
For instance, I was able to ping the website on my host but couldn’t reach it from the outside. So I knew it is the caddy config to modify.
Root cause was missing the Caddyfile in the Docker volume list and forgetting a leading / in the target volume folder.
On the other hand, configuring Gitea was much easier than I thought. Even complex process of registering the runner and its routing through Docker worked at first try.
Now I have a quick and lightweight server that will be able to host my blog with ease.
Next steps - creating a build process for my site - is tried in this post, but then replaced with native Jekyll over here.
Update: Server architecture in January 2024
I have now added several peripheral functions to the server. I have taken care of security and backups as well as automatic updates, whereby the encapsulation by Docker has cost me a lot of additional time and some headache. Even if not all aspects are yet fully covered (notifications, for example, are still an open issue), I am getting noticeably closer to my goal of creating a largely autonomous system.
Ultimately, I want to get back to creating content. And not spend any more time than necessary on all the other stuff.
-
CI/CD “Continuous Integration / Continuous deployment” cares for automatic build, verification, and deployment of my web page. ↩
-
DNS = Domain Name System, a distributed hierarchical system for name resolution of websites. It exists because it’s much less straight forward to enter an IPV6 address like
2a02:ec80:300:ed1a:0:0:0:1into your web browser thanen.wikipedia.org. ↩