AnywhereAmps - Alpha 1.1
Mobile Instrument Amplifier/Cabinet combo prototype Version 1.1, evolving from AnywhereAmps Alpha.
Project stats
- Difficulty: medium 3/5
- Cost: ~200€ plus battery system
- Time: 3h
Updates over Alpha 1.0:
- Add power supervisor circuitry to protect both amplifier and battery pack from abnormal voltage levels / currents
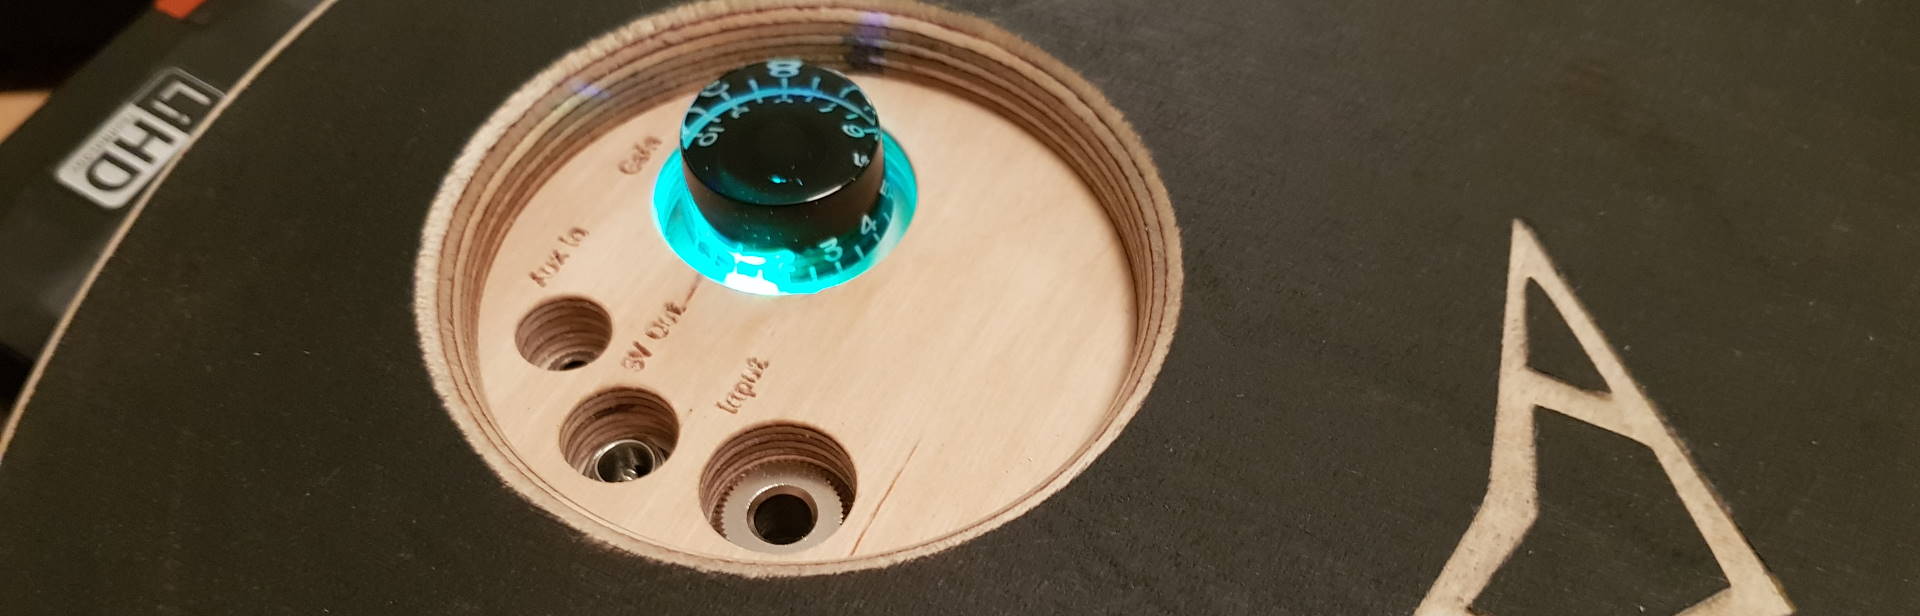
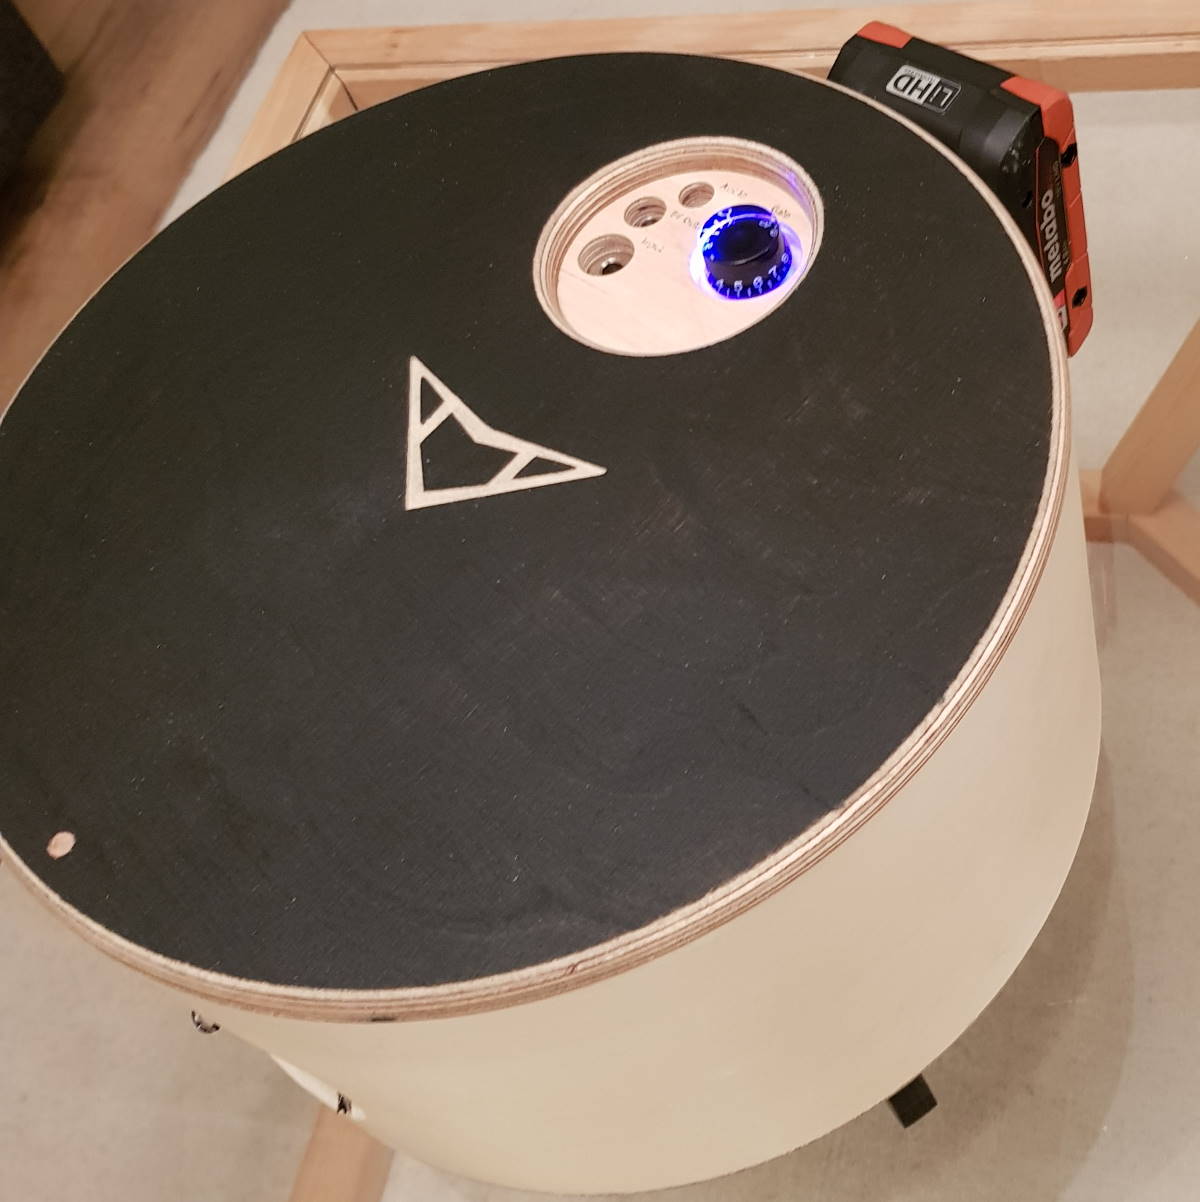
- Integrate on/off switch in potentiometer
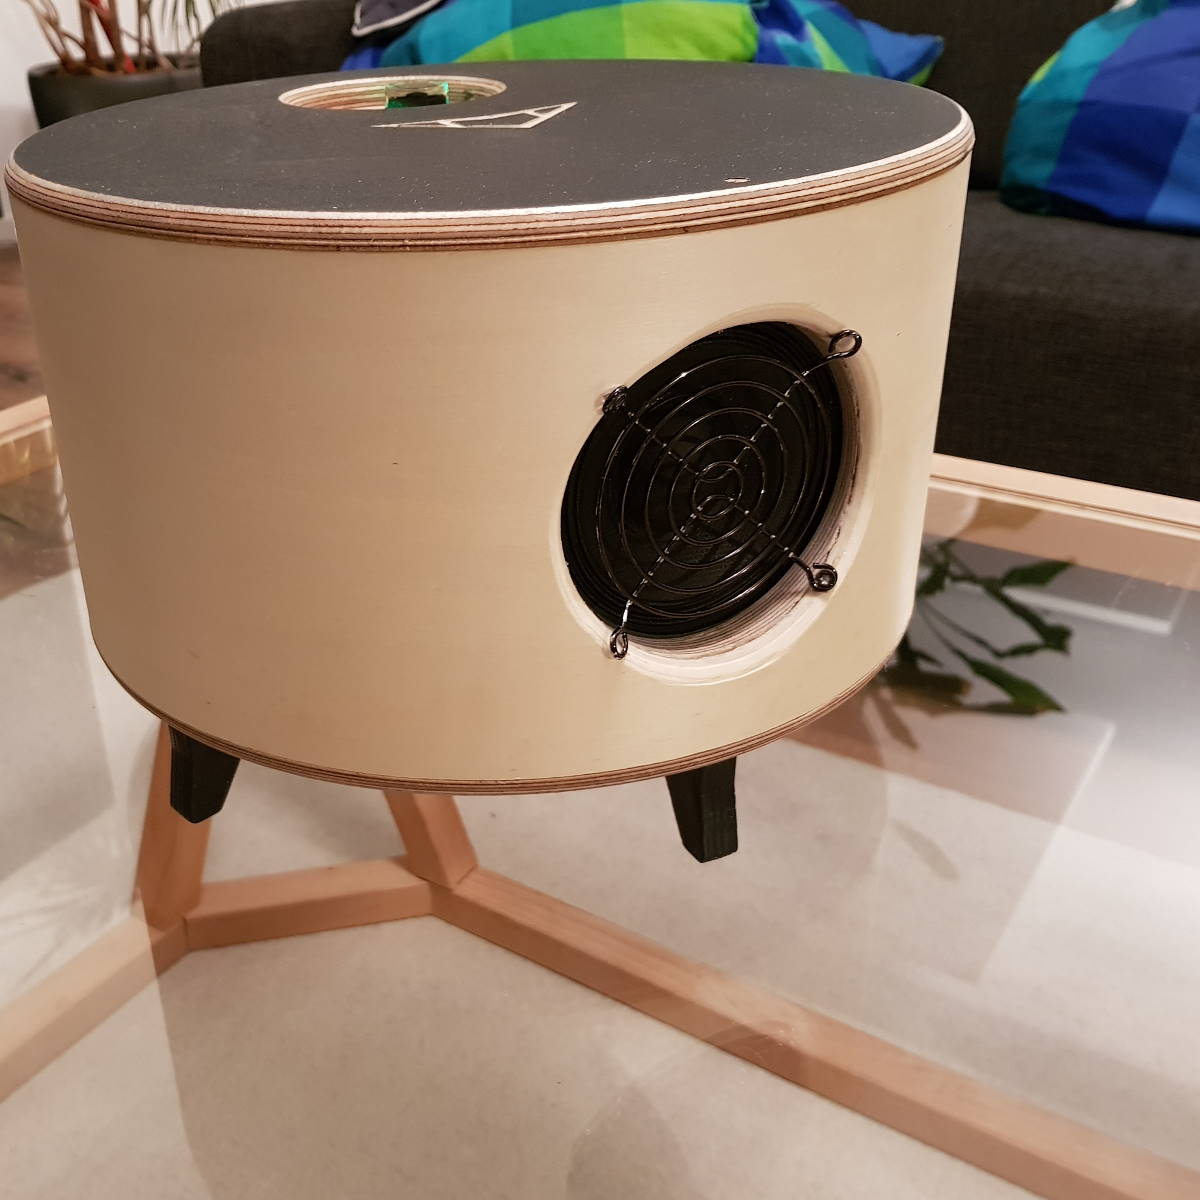
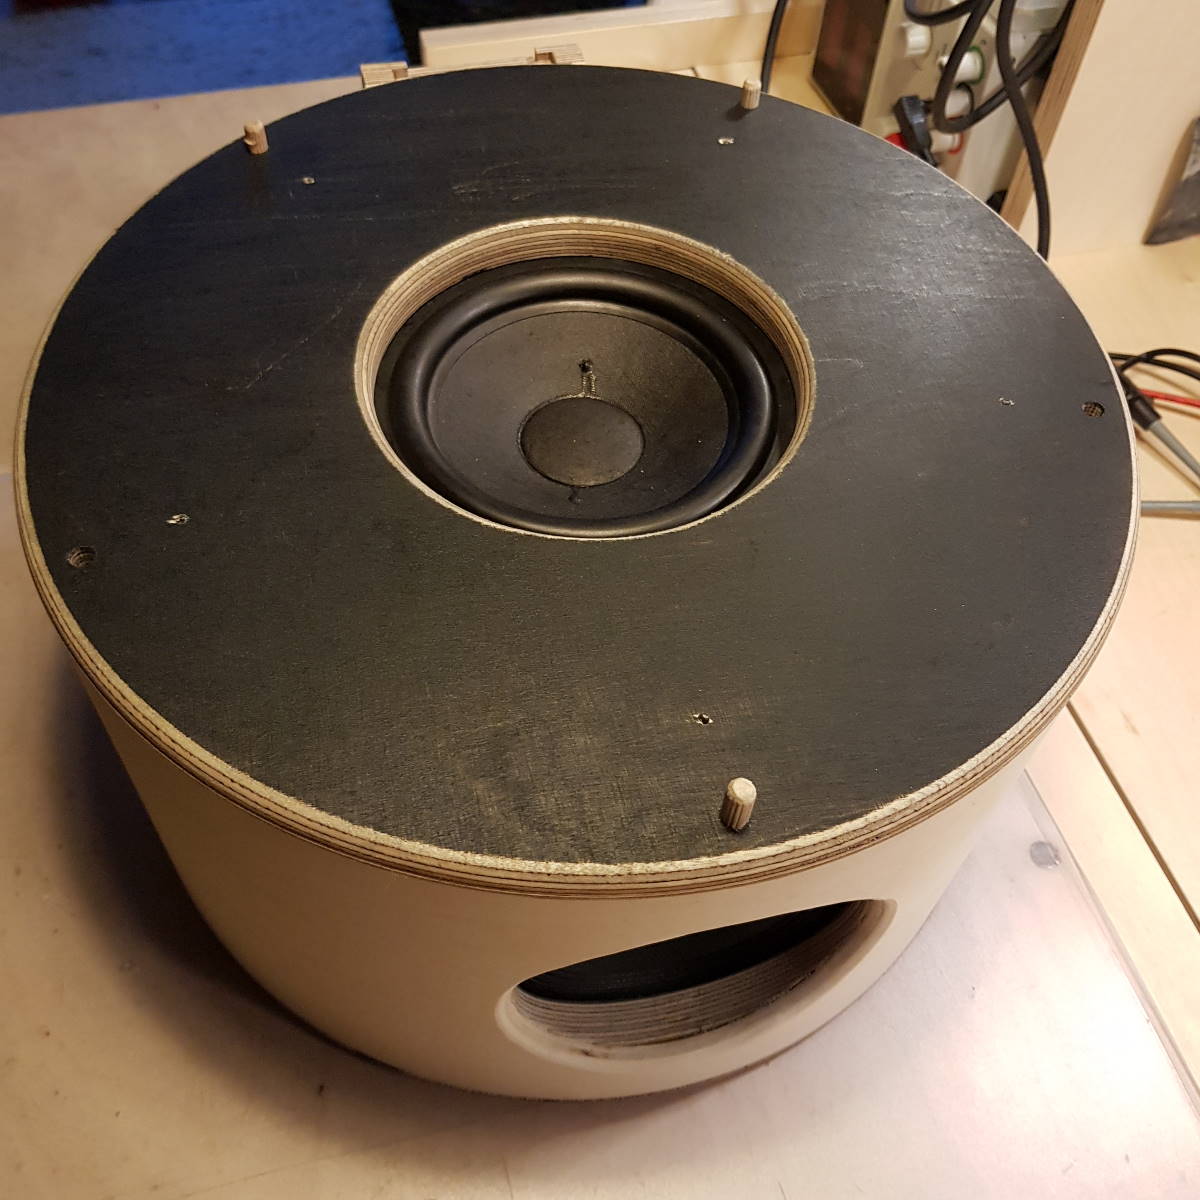
- Reduce complexity by using high efficiency full-range speaker instead of 3-speaker 2-way system
- Add high efficiency switching buck converter to generate 9V effects voltage rail
- Save construction time by using custom printed circuit board featuring preamp, step-down converter, and power supervisor
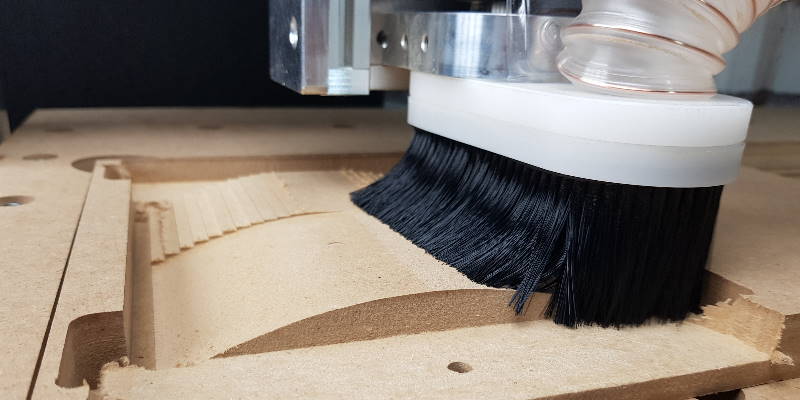
- Save construction time by delegating most of the woodworks to a portal milling machine CNC1
- Eliminate switch-on pop noise by adding a RC-filter to the standby input of the power amp stage
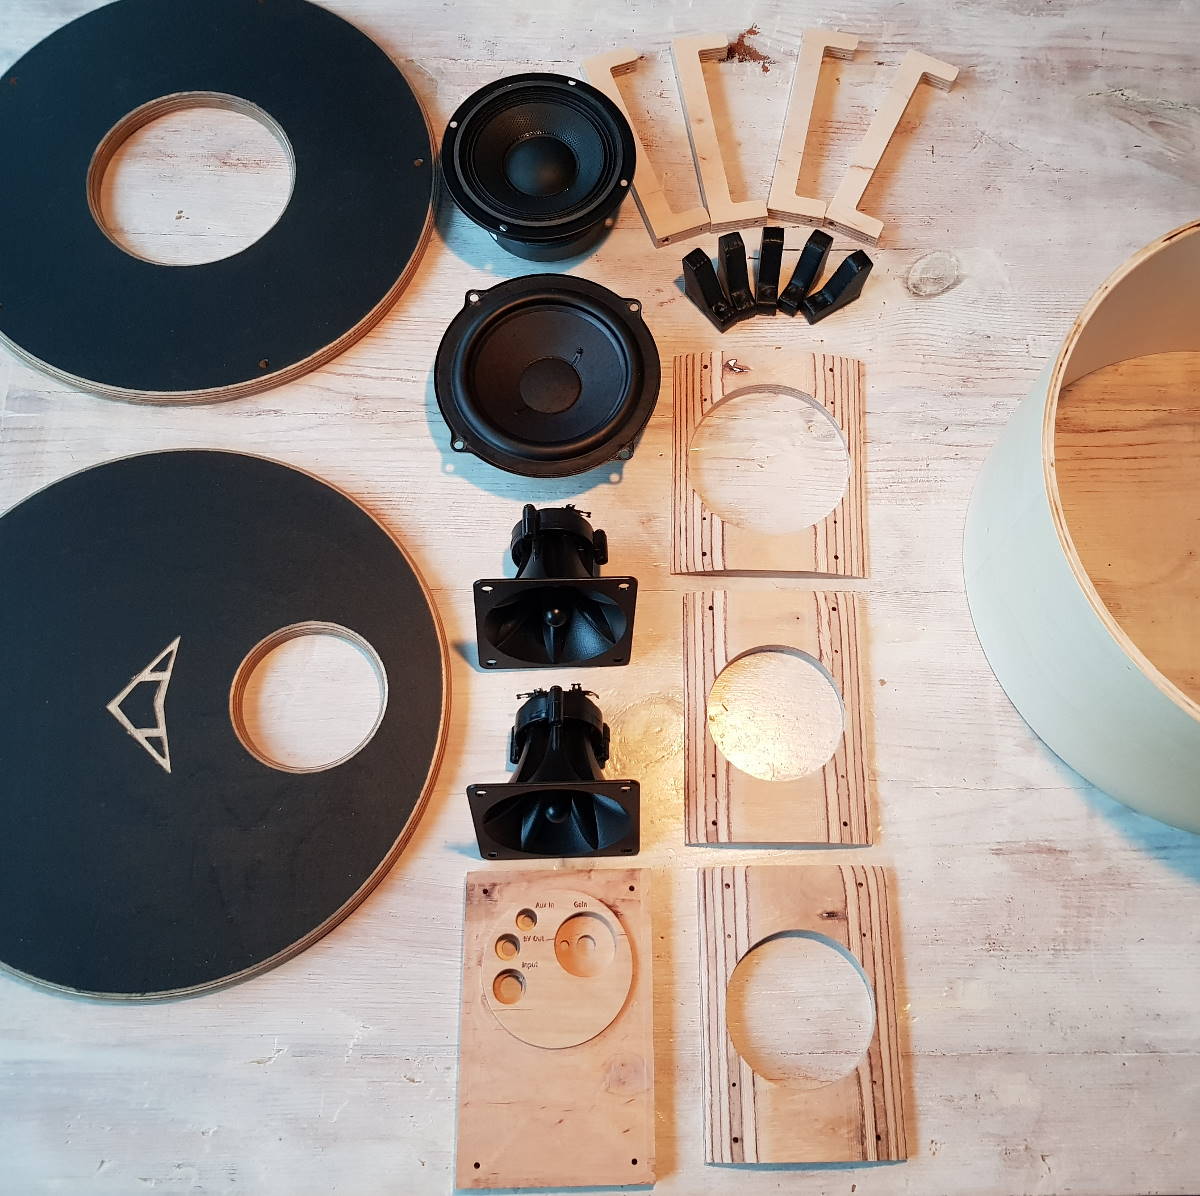
Build variants
To get progress on sound for my prototyping, I built different variants this time. I changed speakers and evaluated the sound:
- Alpha 1.0: 30W bridged amp, 4” bass and 2x piezo tweeters: HiFi-esque sound with punchy lows and clear highs, limited on the max volume side
- Alpha 1.1 v1: 30W bridged amp, 4” PA driver, good volume and high presence, but underrepresented lows and highs
- Alpha 1.1 v2: 30W bridged amp, 4” PA driver and passive membrane, fixing low-end
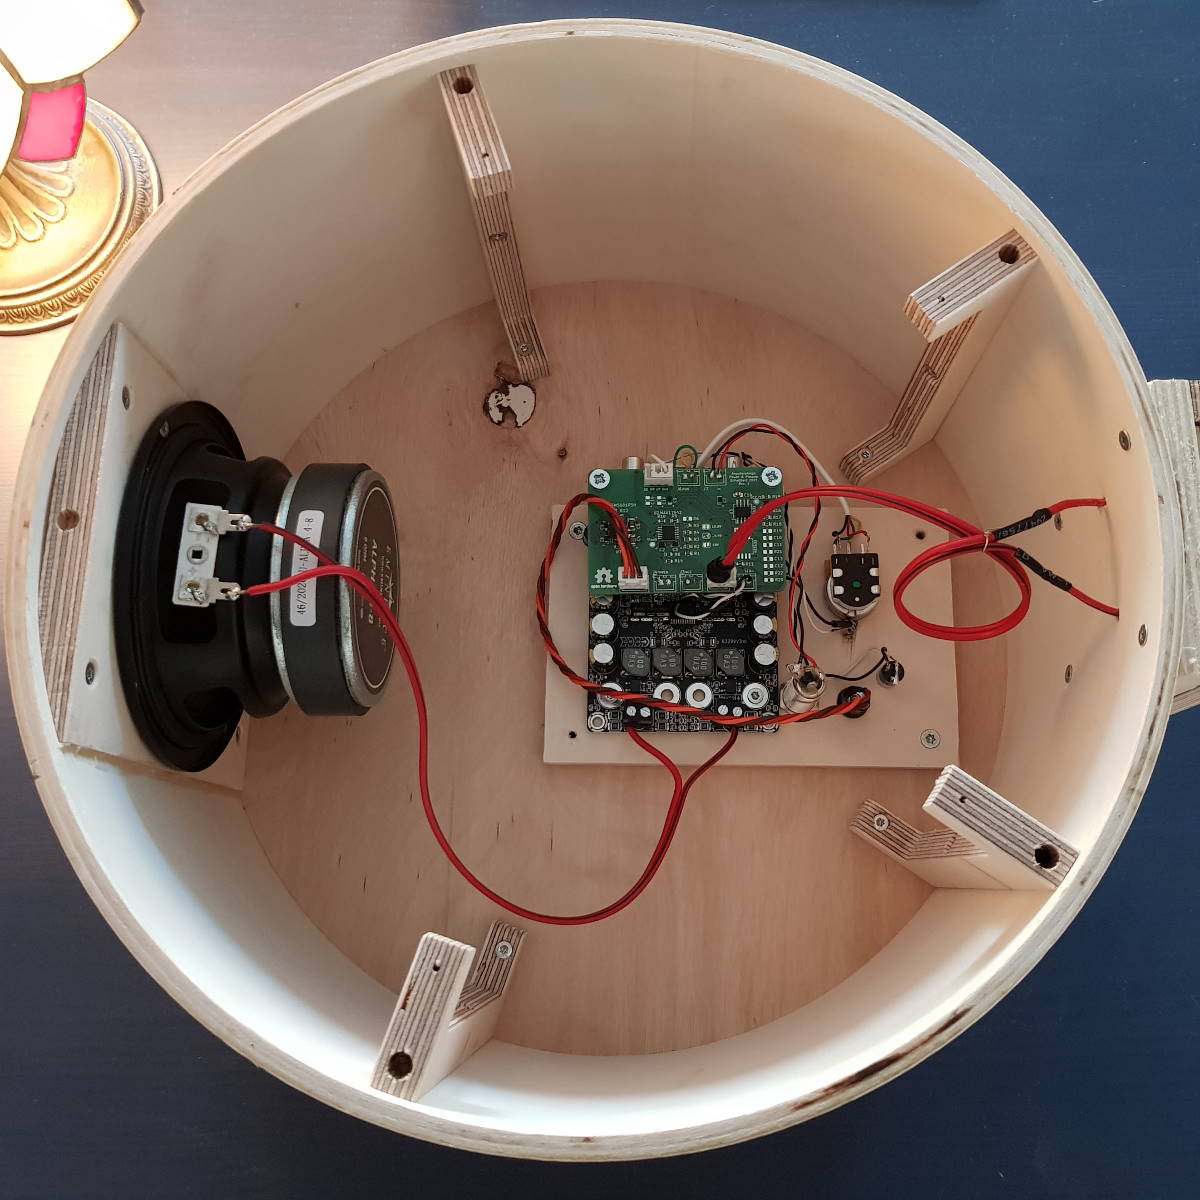
My own preamp and auxiliary functions printed circuit board
The AnywhereAmps 1.1 PCB features some extra functionality apart from the mere preamp plus lowpass and highpass for bi-amping. The details can be found in the following sections.
Power Supervisor
I added the power supervisor circuitry to not allow the battery to run completely empty. I also wanted to mitigate risks created by short circuits and other fault conditions which could harm the battery. The integration of this technology worked on first try (which I hadn’t expected). The only drawback is that when the battery gets discharged to below, say 10%, the amp would sometimes restart on power bursts as supply voltage would drop below the supervisor’s trigger voltage. As the battery voltage would go up again when load reduces, it will turn back on a second later.
This is clearly undesired behavior and will have to be handled with a refined prototype level. Another thing that makes this follow-up prototype necessary is the fact that I am not allowed to use the tool manufacturer’s batteries in my future designs as discussed here.
9V switching buck converter
To generate auxiliary 9V for devices like effects, loopers etc. I wanted to reduce noise by selecting a “quiet” switching regulator. The one I chose was designed for automotive applications and has the inductors included in its enclosure. The down sides are that the footprint is not suitable for hand soldering and the high price tag.
The converter would switch on when a device is plugged into the corresponding jack so that there’s no stand-by current. It operates quitely (but not completely without noise) and more than enough power for the applications I encountered so far - A looper, compressor, and tuner can be easily operated in parallel.
Woodworking
I bought a portal milling machine set to delegate the woodworking for AnywhereAmps to. I wanted to spend less time on cutting and sanding, and improve build quality as well as reapeatability. But changing the manual woodworks to more or less automated machining, I had to first move my plans into the digital world.
Computer Aided Design
I chose FreeCAD as design tool to create drawings. I documented the work with this tool in a couple of posts and continued to refine my workflow e.g. here. My first scetch to manufacture looked like this.
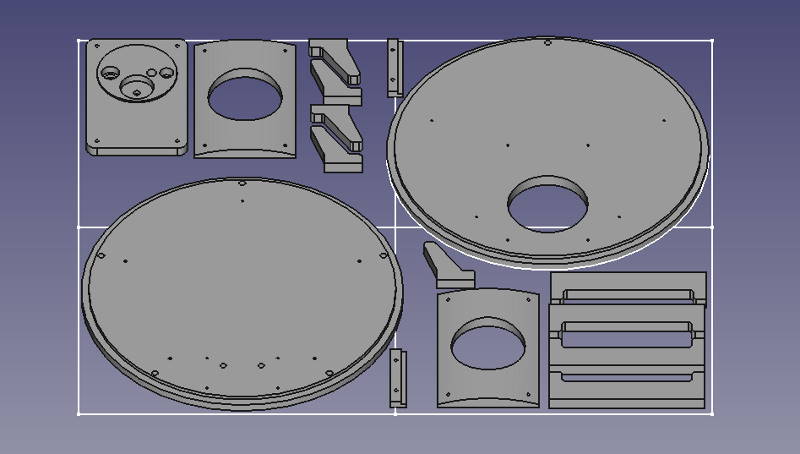
I was not completely happy with partitioning the sheet of wood yet. I found the legs too long and put some more hours in refining the design to use less space as the handling capacity of my portal milling machine is limited.
Computer Aided Manufacturing
When done, I exported the scetches as *.dxf files (Drawing Interchange File Format (DXF), introduced by AutoDesk in 1982. It eventually became industry standard for interchanging 2D drawings) and opened them in my CAM tool to define tool paths, set XY zero, and Z depth per pass.

G-Code

I ended up with G-Code files post-processed to match my machine with a forecast duration of 32 minutes per sheet. I was using just three tools: a 6mm endmill for the cutouts, a 2mm one for smaller holes and structures, and an engraving tool for chamfers and logo. I partitioned the work into three jobs:
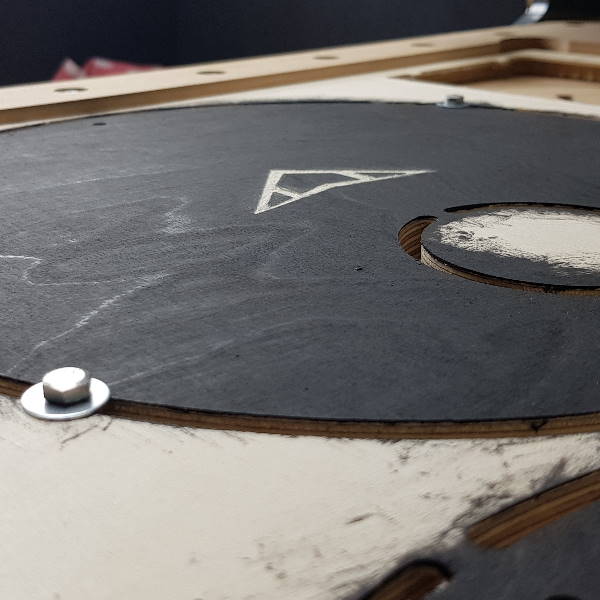
job00_clampingto cut holes and countersinks into the sheet to allow attachment to the workbedjob01_nestingto do all cutouts and engravings on the ampcarrier, but leave taps so the parts don’t movejob02_finishingwhich cuts the logo on the (already coloured) top side and adds chamfers where needed
For finishing, I had to update CAD and CAM files so they would provide a mirrored (and turned by -90°) view of the sheet. This is to allow two-sided milling with the same XY-zero point and the exact same sides touching the fence for minimal tolerances.
Manual work remaining
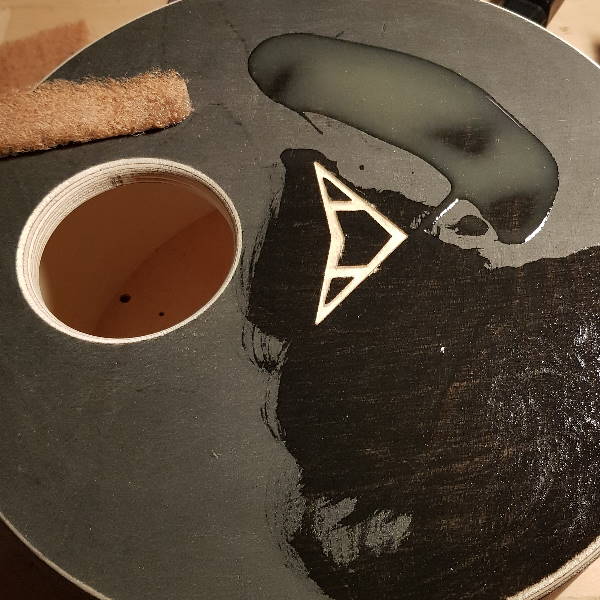 I had to do a little manual work like sanding down taps, adding wax to get the top finish done, and cutting some holes for struts and stands that my CNC couldn’t do because they are on a plane orthogonal to the Z-axis.
I used the CNC to create adapters for my hand router so I could have it glide over the bent surface of the shell. This way, the holes that I cut in there for the speakers before could be properly chamfered.
I also had the CNC manufacture a shell holder in 3D-mode (with *.STL files). This way, the shell is kept in place when cutting holes for the speakers with my hand drill. By the way: 3D cuts take a lot of time as finishing uses small stepovers to get a smooth surface. I’d like to further improve shell handling; hand-cutting a >100mm hole does not allow good surface quality on the inside of the shell, and handling that huge drill is still a pain. Unfortunately, my CNC is not able to to this job for me.
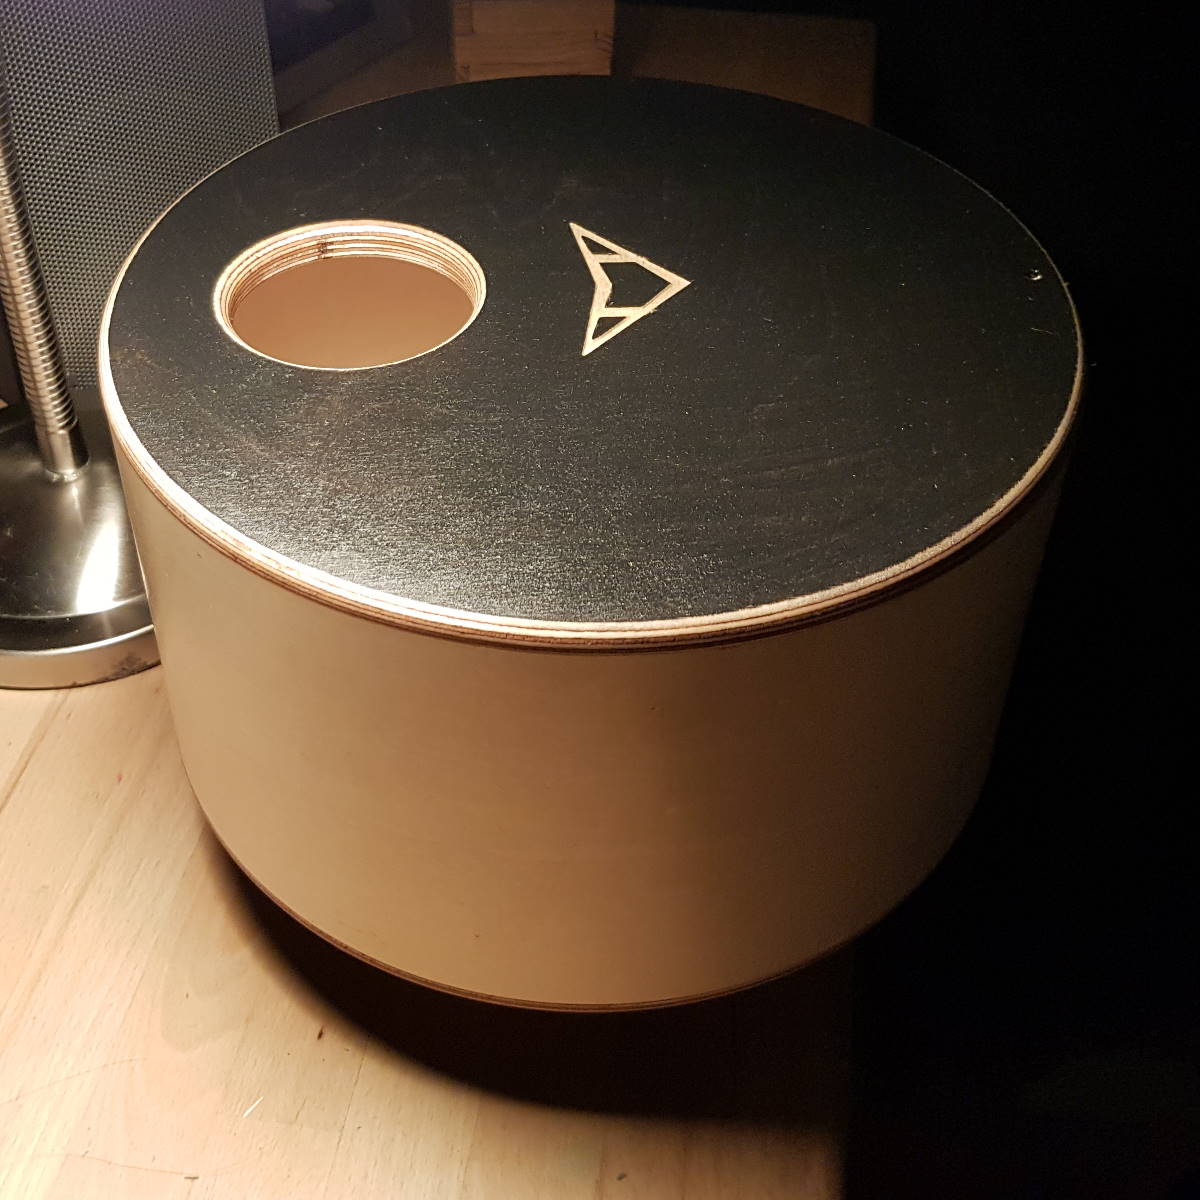
Impressions
-
Computerized Numerical Control ↩